So lets answer the first question. I use EVERYTHING. Yup. WHY? Because I am a graphic Artist that is my business and sometimes I need the versatility of a broad range of graphics programs. Some may do the same thing but one may do it better etc... I use the following; Corel Products, Photoshop Elements, AI (Adobe Illustrator), as well as some additional elements like 3D renderers etc. Now on to the other questions from above. For the general user who likes to scrapbook, card make, Journal Creation, Pocket Letters (TM) etc...Pic Monkey will be great for you. First because its free. Yep free. And if you do more than 1 to 2 images a month than you can join the Pic Monkey Royale. The Royale version gives you more editing tools, its a subscription and they are letting you try it right now for free! The best part? Its super easy to use. Here's the other cool factor; I love the Graphics Fairy Site and get a lot of cool tools and inspiration from Karen & Emily over there. These two ladies use Pic Monkey all the time and do some awesome tutorials on how they did stuff using Pic Monkey. So if I show you how to use it/get it you can use her tutorials and get more stuff as well. So its a win win. Using Pic Monkey you will also be able to use/edit and create with all of the wonderful packages I offer in the store. So first lets start with finding Pic Monkey. Wait what is Pic Monkey again? Simply it is an online website where you input an image, edit it through an online interface, and then save it back to your computer. You are not opening software stored on your computer or downloading anything; it’s all done online. What is super awesome about this feature is that having extensive software programs not only takes up a huge amount of space but also uses a gross amount of memory. This can cause your computer to freeze up and a need for a reboot. Unless your a Mac user in which case that rarely happens lol. I use a PC because I like headaches... … . . . … Uh Yeaaaah ok moving on... Lets get back to where to find Pic Monkey... We are going to start by opening it in another window for you so you can go back and forth from here. Once you have it open be sure to book mark it so you can find it again easily. Click on the words here: Pic Monkey
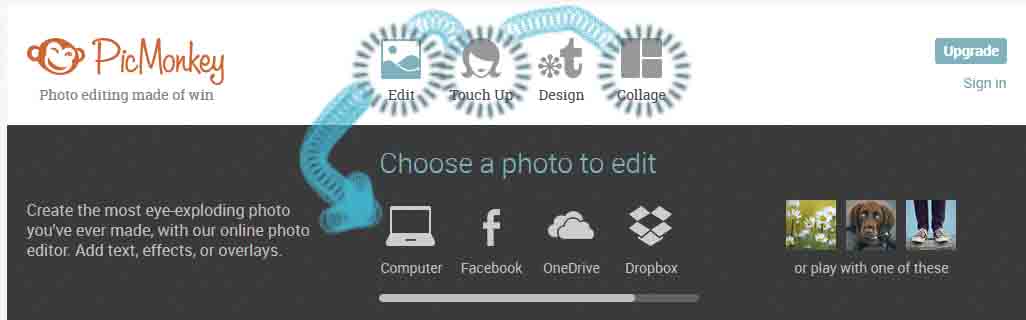 When pausing over/choosing either Edit, Touch Up, or Collage you will see the screen options above that let you choose where to pull the image you want to edit from. Your computer, Facebook, One Drive or DropBox.  When hovering over the Design Choice you can choose a canvas size to start with. If you choose custom, you can make any size. Note you wont be able to do it in inches it will request pixels. Thats ok! We will help you through that. First it will be important to understand the following. If you want to create something that looks great printed you want to use 300 DPI. If you are creating an image for the internet/web commonly you will use 72 or 98 DPI. this will help in determining the quality of the image you wish to create. Now lets convert inches to pixels. The easiest way is using this tool, click on the words... Pixel Tool. Don't forget to book mark this page too.  Plug in the inches of the creation you want to make on the inches line. So in this case I want my image to be 2X2 inches (but if you want your image to be say 2X4 you will need to plug in the 4 to get your other axis which is 384). As soon as you plug in your inches the converter will tell you how many pixels and 192 pixels equal 2 inches. Now I know that when I choose Custom on Pic Monkey what to plug in for my pixels when it asks. If I want 2X2 I will type in 192X192 or if I wanted 2X4 I would type in 192X384. You with me? It will look like below! 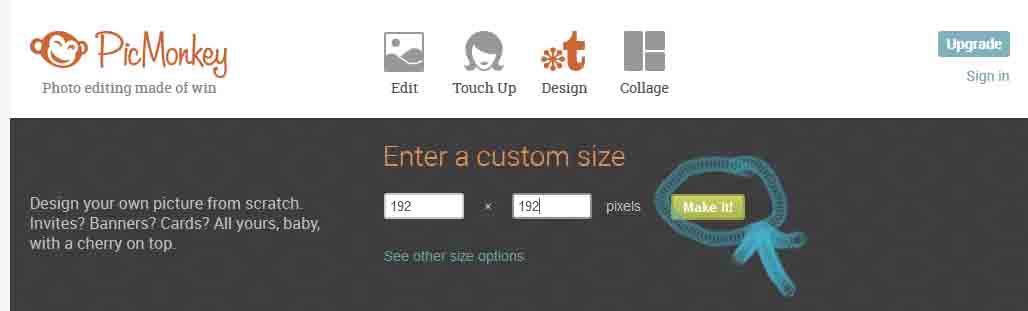 Now click on Make it! Your image sized work space will show up and your editing tools on the left. 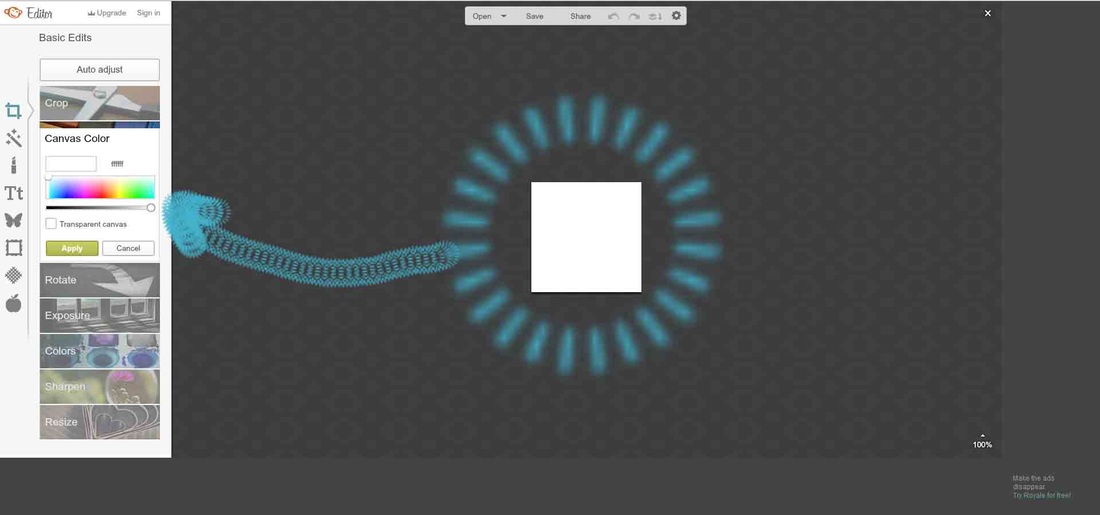 It will be fun to play around with the different options available so try all kinds of things. If you wish to edit an image that I give you for free off the freebie page you will choose the Edit option instead of custom. So which do I choose for my project? Here are some guidelines. Which button should I use to get started? I personally use the Edit and Design buttons the most. Here is how to choose one option over another.
This will hopefully give you a clue as to what option; free or paid Pic Monkey would be best for you. It's around $33 for a year for the Royale paid subscription which is the best for the money, you just can't beat it. Now the other option which is not free but you buy a copy and its yours to work with forever and that's Corel Paint Shop Pro. I use this a lot and its my go to Program I LOVE IT. I will be showing how I do things using both Pic Monkey and or Corel most of the time. Pic Monkey because its free and Corel because its very inexpensive compared to Photoshop and just as strong. You can pick it up for around $30-$70 at Corel.com depending on the constant sales they have. I appreciate you stopping by today and hope this helps you determine what will be best for you to work with. Save one of the images you like off the freebie page to your computer and try playing around with it in Pic Monkey. I will give you more tutorials later. Show us what you came up with in Pic Monkey please do by sharing through the contact page you image and how you did it. 
0 Comments
|
About this page.
Life in general is an art and I will show you how to find the beauty in everything you see and do. Subscribe and receive a free weekly download and updates. Archives
May 2019
Categories
All
Are you able to donate a $1 through PayPal to help assist this artist in keeping this extensive site alive. It is all out of pocket and costs over $50 a month to finance. If you enjoy this site it would really help. Thanks in advance! |


 RSS Feed

|
|
©1996-2022 GrafXQuest LLC All Rights Reserved.
|
|