A Tribute to Alan Rickman and a "Snape" planner Sticker Freebie Below.
I was discussing Alan Rickman with a friend yesterday and realized there are a lot obscure parts in movies he played that are easy to miss or forget. However one must realize that when saying "oh yeah, I remember that film" that once mentioned even if his part may have been small, his presentation of the person he portrayed is unforgettable. This man began his career as a movie actor after the age of 40. This goes to prove that if you have the right mind set, you can do anything at any time. Don't let the world stop you. It's only over when you pass, as I regret to say this is the result as of yesterday for Alan, however he will be remembered by you, me, and the family and friends who were so lucky to touch his life.  A recent short film with Alan you may have missed. I will not give anything away you must see it! Among other films you may have missed are Galaxy Quest, A little Chaos, Perfume, Robin Hood Prince of Thieves, Dogma, and Sense and Sensibility. Though this is actually only a small clip of all of his films that he has been in, it's a chance to see this brilliant man in a variety of situations. I highly suggest giving them a try.
Of course most remember him in the roll as Professor Severus Snape and because of this we have for you today in memory of this wonderful man, a freebie Planner Sticker Printable for your daily planners in honor of Alan Rickman as Professer Snape. Click Here. We truly wish to thank you for visiting us today and we send a beloved adieu' and a hats off to Alan Rickman and offer our hand in fan support to his beloved family for strength and courage. ~Lady T
0 Comments
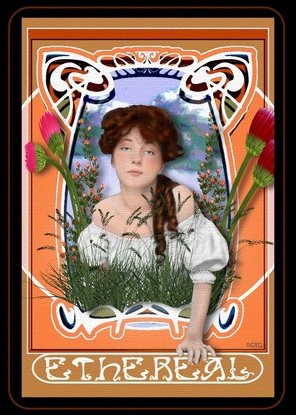
I chose Evelyn for her extraordinary beauty. She was 16 in this image and became what would be known today as a supermodel. You can read more about her on other images in the store. I hope you enjoy her. Took a while to get it just right but its still not perfect. 
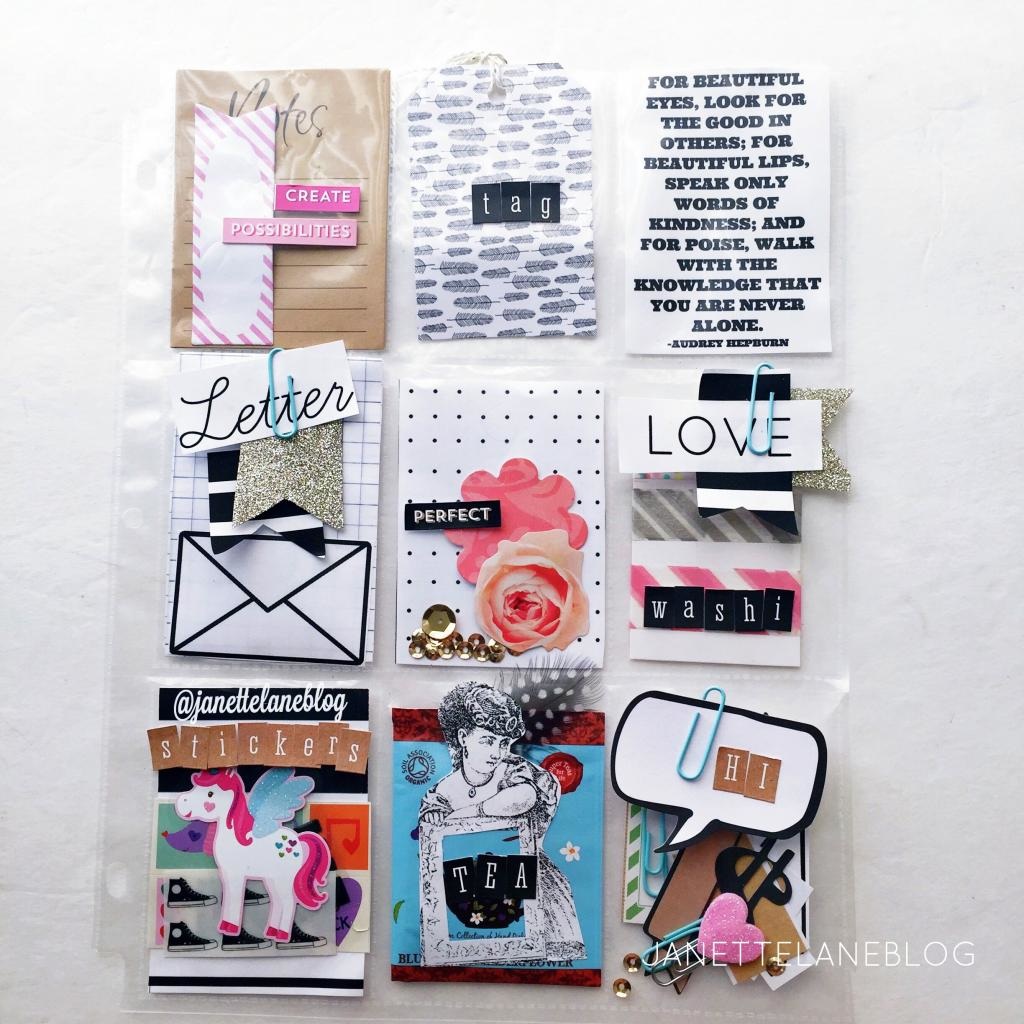
What is it? Quite simply the idea behind it is a new way to write letters to pen-pals for a one time-swap or permanently. You decorate all of the inside pockets of a trading card sleeve (fronts & backs) and send the whole page to someone who wants to swap with you. You can fill the pockets with anything you like (stickers, tea bags, a note, washi tape samples, pictures, etc.) Then you include a short letter/note to your new friend and tuck it in one of the pockets. It's the perfect way to collect letters from pen-pals around the world and a convenient way to store them because they will fit perfectly in a three ring binder! The bonus? You can start a collection of nifty items from around the world by trading with people internationally as well as keep our wonderful post offices a float with this new rage of snail mail. The cool thing about these is after your fill them they will fold down to fit a standard #10 envelope (if you didn't make it too fat lol) and its' not too expensive to send it this way. Just be sure to weigh them out and include the correct amount of postage. How do I make one? First start by purchasing standard trading card inserts used for baseball cards. They are 8.5x11 (inches) and are also referred to as 9 Pocket Page Protectors. You can find these pretty cheap on Amazon or at your local Walmart. I just picked up 100 for 14.00 on Amazon last night. You may want to pick up a few boxes if you are serious about doing this project because I can foresee these increasing in cost, just because of the supply demand. When designing the images and cards/items to fit these 9 individual pockets the image size is 2.5 Wide by 3.5 Tall. You also want to think about designing both the front and back sides of the inside pockets; because when you add them to an album it would be nice to have images on both sides when you flip the pages. You can of course just create some for you or start making bunches of them so you are ready to send one on the fly. According to Janette these pockets also do not hold a PL (Project Life Card; whatever that is). She stated that they needed to be trimmed down. You will be able to find all kinds of images and pocket sized art work here on this site, (in the store, freebies and specials pages) that you can use for your creations! Yea!
The upside is there are some sites where you can join groups and exchange themed pockets right away with others. I found such a group the other night and they are free to join and participate and it also just so happens to be Janette's site which was a happy accident; you can find it here: Pocket Letter Pals . As I said this is a great way to meet new people and make new friends and quickly collect some really cool pockets. Just be careful not to overwhelm yourself with taking on too many at once as you don't want to fall into that Flaker category. So far I have seen Coffee, Owl, Spring themed pocket swaps and so much more. Happy Pocketing and remember to grab some images from the site to get you started. We have a lot to offer and a lot more coming soon! 
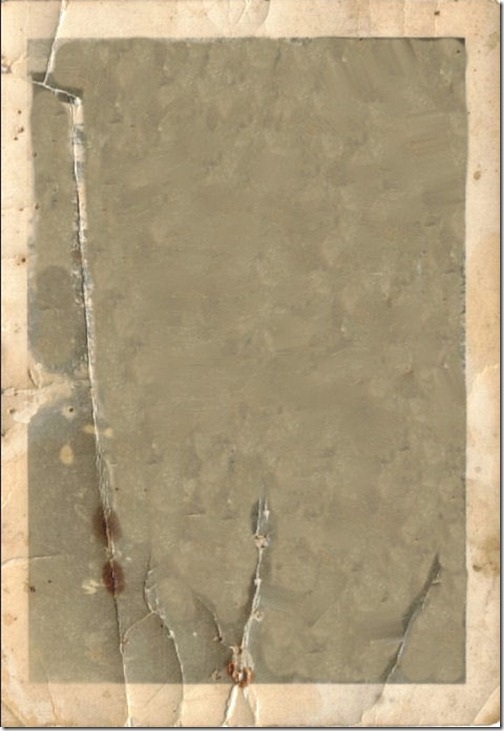
So is it an art to create Vintage photos? Well yes but it doesn't have to be. This photo I did of Tom Cruise took me about 15 minutes. And I am quite happy with the results. Below I will tell you what you need if you want to create something like the Tom Cruise photo. Why Tom Cruise? He is gorgeous...I don't think I need any other reason and he looks awesome in vintage. Ok so here is what you will need. You will have to have some kind of photo editing software and happily there are free ones out there. The cool thing is I didn't use any advanced tools in any of the programs. Anyone should be able to do this. You can download Adobe Photoshop for a free trial, or download Gimp, (which I find to be a bit non user friendly) but there are many out there just google free Photoshop programs. They will need to be able to erase, airbrush and create layers. The Tom cruise vintage photo was done with 3 layers. The original photo, a piece of digital grunge paper, and an old tin type frame. That's it. You can find these items again by doing a simple search on google. When typing in "Grunge Paper" to Google there are many choices. This is one that I found cool.
Now that we have our three images we need to meld them together. You want to start a "New" Image in your chosen program under the top left corner menu choice of "file". I chose a 8X10 inch format and 150 DPI if your program asks. DPI is the resolution in "dots per inch" The higher that resolution the better your print outs will be but 300DPI is HUGE and you will probably only need 150 or less. Images on the net are usually set at 72 DPI. The reason I choose an 8X10" size is so that I have room to move things around and work just like a table. I can crop it later using a simple cropping tool. Now you want to open each of your images into 3 different layers. As shown in the red circle below. 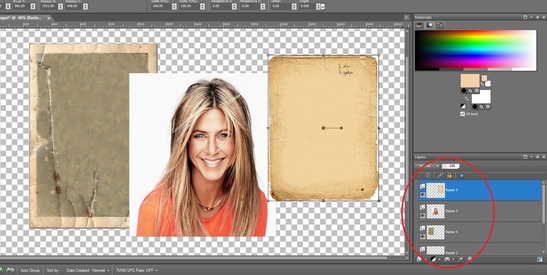 By clicking on the layers you want and then right clicking you should be able to alter them. We want to take our Grunge paper layer and make is 50% transparent. 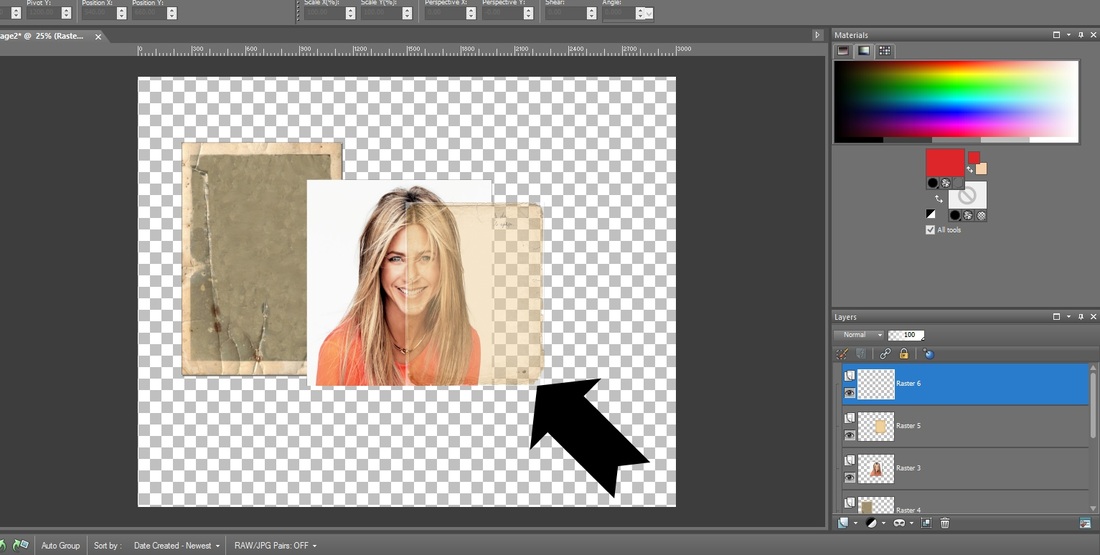 You can see that by pushing the now 50% transparent layer over the top of Jenn's photo she already is starting to look vintage. WOOT! Now you will do just that. Take that transparent layer and move it completely over the photo. Now usually I would never adjust an image from the sides but in this case since we want the grunge paper to give our photo that look we don't have to worry about stretching it out of shape. So go ahead and do just that. Grabbing from the corners and sides adjust that image over the top of your photo until the corners match up. It should now look something like this: 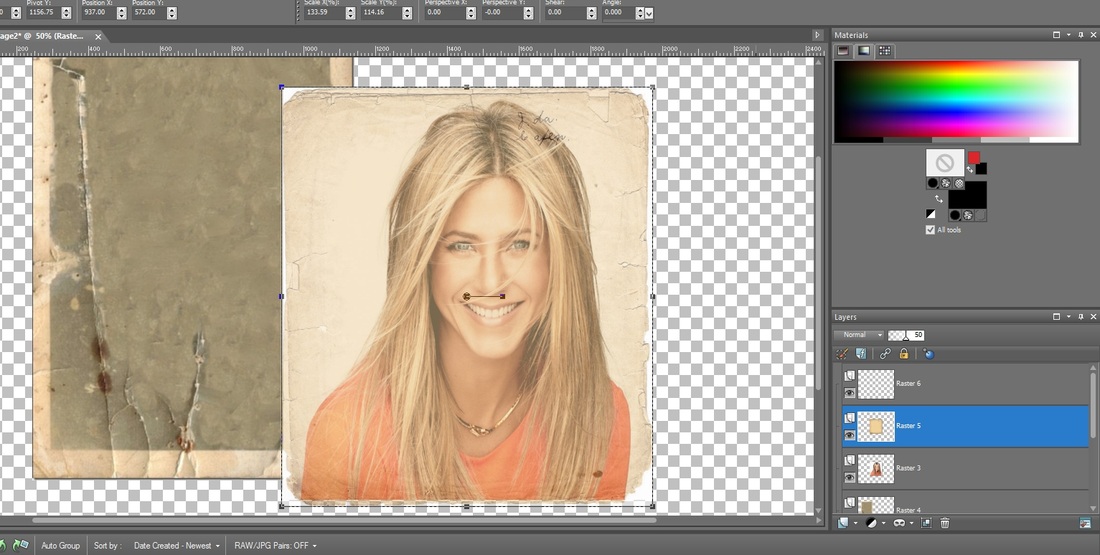 At this point you can leave it like it is or if you want it to look more vintage you will need to adjust your actual photo to a black and white image. I am going to go ahead and do that and then I will merge these 2 layers together by right clicking on the grunge layer and merging it down on top of Jen's now black and white photo. Be careful not to merge the wrong layers, you can move them up and down by dragging them in the layer panel. Then I will take my eraser tool and start erasing the white edges that are showing down to the grunge edge. Yes there are better ways to do this but this is a simple tutorial. Here is the black and white merged with the grunge and the eraser tool showing: 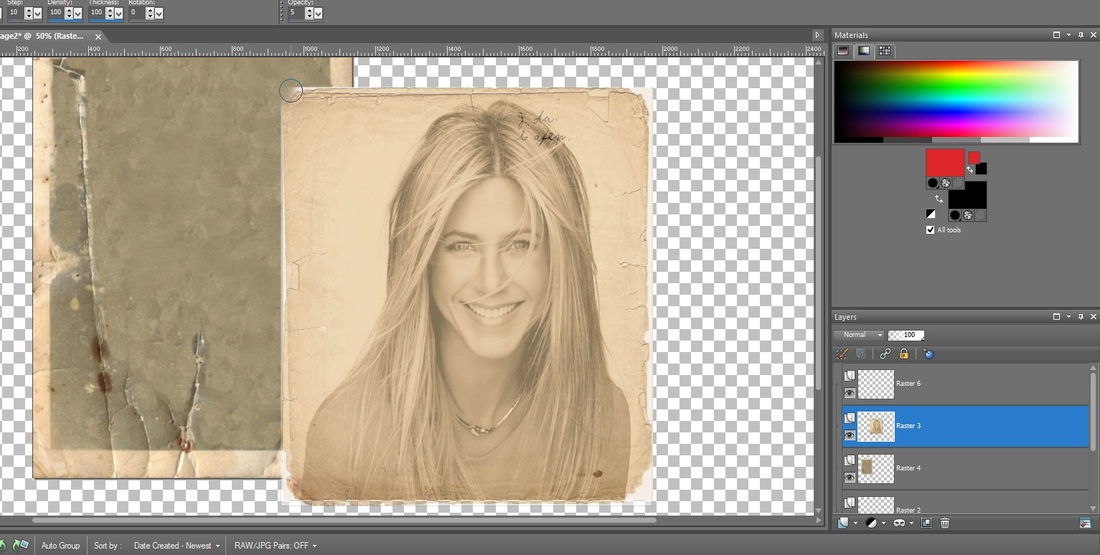 Looking very vintage already yes? Ok now in my case the image I chose doesn't match up with the final Polaroid image. We can't stretch the Jenn Image from the sides because it would alter her face. We can size her properly from the corner but the Polaroid will still be a bad match up so what we do is stretch our Polaroid to fit because like the grunge layer we wont really see it in the end. I am also going to take my Jenn photo layer and make it 90% transparent. Why? Because I want to be able to see some of the cracks and stains on my final image. I will then take the eraser tool and lightly erase just a few of the grunge edges so the Polaroid will show through; this will also give it the dark vintage edge. I also did a little erasing of the Grunge layer over the cracks of the Polaroid so that you can see the tear cutting through the bottom. You can do two things now; darken the edges of the inner Polaroid with a black airbrush to darken it up further for your edges or just merge your layers now and crop your photo. I did not use the airbrush on this one BTW. And here is the final product: 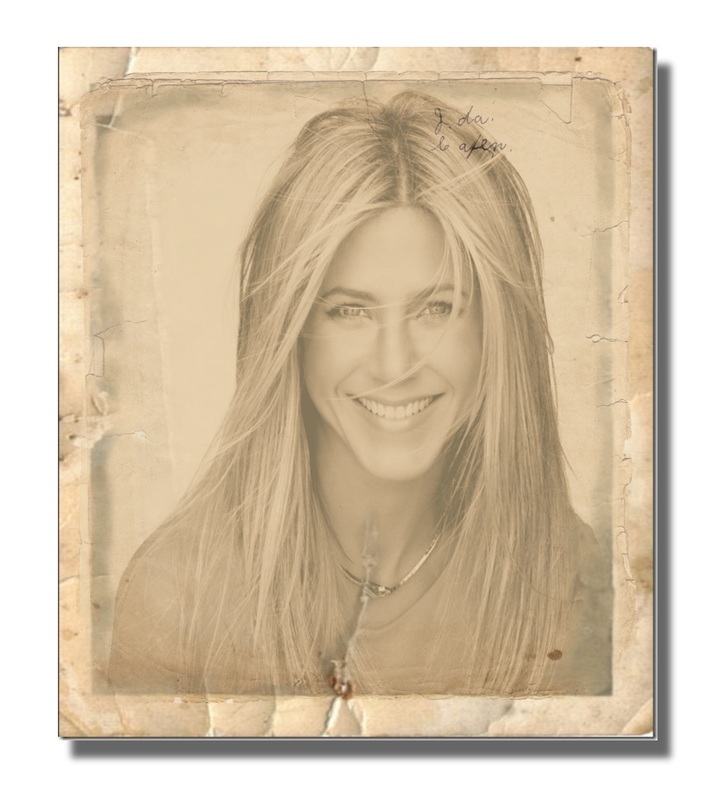 Pretty nifty huh? And done in less then a half hour with the tutorial but once you get good at it, it will take less then 15 minutes. Super fun. Now go forth; now that you understand the "Art of Vintage Photo Creation" go do your wedding photos! Make sure to upload them to our DIY page we would love to see what you did! Have a great time!   One of my regrets is to flood the internet with yet another reminder of this passing genius. But I must because the loss of a great artist in any form is not only heartbreaking but thought provoking.
I remember all to well Robins' first break into Comedy television through Happy Days as the beloved Mork from Ork. Then to break into his own show Mork & Mindy. I remember eating a chocolate chip cookie while I was explaining to my mother how funny Mork was and demonstrated sitting on my head like he did in the show. This is when the chocolate chip cookie I was eating went up my nose. I will never forget the laughter we all had and the pain in my nose from the cookie now stuck in my nasal passages lol. It breaks my heart that his family suffers such a great loss. It breaks my heart that he wasn't able to find the help he needed and decided that the only help was at his own hand. It serves as a reminder for those like myself who suffer bouts of depression to seek help because this was not the answer. We have lost a genius in his own rights. This provokes me to reach out to those of you who suffer depression to please seek the help you need and keep those close around you closer. It seems that sometimes those who are as clever and talented as Robin may suffer in general because they are such genius the ADD in their mind probably drives them to distraction. I myself have this issue. Not that I am saying I am a genius, but I have so many ideas spinning all the time that even in my sleep I invent and create. A sign of a genius? Maybe. A sign that the brain is overactive? Definitely. The question is do you try to tame the monster or do you set the monster free. I think Robin knew how to set the monster free by trying to make others happy. By making them laugh. By making them think. But I truly feel that he did these things because deep down he didn't feel accepted or hid his true feelings to others by covering it funny faces and laughter. The character Hawk Eye Pierce from M*A*S*H was a lot like that and was accused of such in one episode. The reason I remember it is because I saw that reflected in myself as well and I have never forgot it. Being self aware is a great place to be but everyday is a struggle to remain positive. I challenge you as I ask you to always challenge me. If we challenge each other to find what is beautiful in the world today and everyday we will live life to its fullest. Godbless Robin Williams and I bid you adieu. I salute you as an artist, teacher, a father, a husband, a friend and inspiration to many. May you find the peace you were desperately seeking. May your family find warmth in your memory and the strength to understand that as in life you taught us all and in death you will continue to do so. GOOD morning VIETNAM! |
About this page.
Life in general is an art and I will show you how to find the beauty in everything you see and do. Subscribe and receive a free weekly download and updates. Archives
May 2019
Categories
All
Are you able to donate a $1 through PayPal to help assist this artist in keeping this extensive site alive. It is all out of pocket and costs over $50 a month to finance. If you enjoy this site it would really help. Thanks in advance! |


 RSS Feed

|
|
©1996-2022 GrafXQuest LLC All Rights Reserved.
|
|