Search the site...

Graf X Quest
  • HOME
    • Offerings & Pricing
    • The Design Process
    • Portfolio
  • ■ Global Market Place
  • ■ Free Content
  • ■ Vintage Free Images
  • Blog & Public Tutorials
    • Member Tutorials
    • Zenful Artistry
  • Simple License Overview
  • HOME
    • Offerings & Pricing
    • The Design Process
    • Portfolio
  • ■ Global Market Place
  • ■ Free Content
  • ■ Vintage Free Images
  • Blog & Public Tutorials
    • Member Tutorials
    • Zenful Artistry
  • Simple License Overview


You did it!

DIY By Mary from Vintage Reflections

4/9/2015

 
Picture
After you get a gander at this excellent project, hop on over to visit Mary at Vintage Reflections.

I asked Mary if I could share her wonderful project idea with you and she said yes! Yea! I found it very inspiring and easy as well as fun for everyone.

More than likely you already have everything you need at home so read on to make these wonderful clings on the cups left.  For deeper detail please visit Mary's site.

Vintage Reflections.

s t e p 1
Find your image. How do you want to customize your item? Do you want to create seasonal or holiday decor? do you want to personalize it with someone’s name? or give it a vintage touch?  Well, depending on what you want to do, you will either search for clip art on the internet or create it yourself.

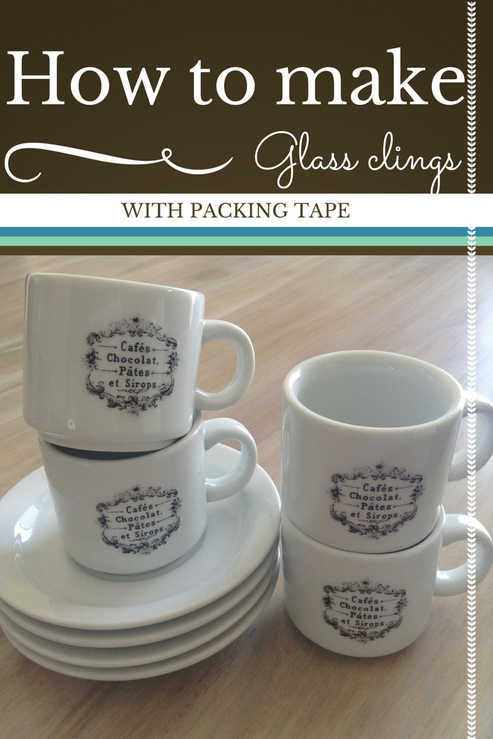
Mary wanted her espresso cups to have a vintage coffee look so she got her image from the Graphics Fairy.   Or just hop on over to our freebie page On GrafXQuest to find truckloads of amazing images to use.  Open up Photoshop and size it so that will fit your chosen item. You don’t have Photoshop? It’s all good. Just use any photo editing software that came with your computer. Mary copied the image and printed out 4 on one sheet of paper. No need to reverse your image.

s t e p 2
Get your packing tape and cut out a piece of tape and stick it over your image. Try your best to keep it flat without wrinkling the tape. Then just rub it down with your fingernail or back of scissors to make sure it’s nice and flat.

s t e p 3
Cut your image now with the tape still stuck on it. Cut as close to your image border as you can.

s t e p 4
No waiting or drying time involved here. Get some water and wet the back of the paper. Basically you are wetting the paper side. Rub off the paper slowly and you will see the image has transferred to your tape and you now have a transparent glass cling.

s t e p 5
Wait until the back dries up a little. Mary just blew air on hers and it was dry and sticky in no time. So there’s no need to apply any adhesive. It will still be very sticky and you can now go ahead and stick it on to your glass.

Picture
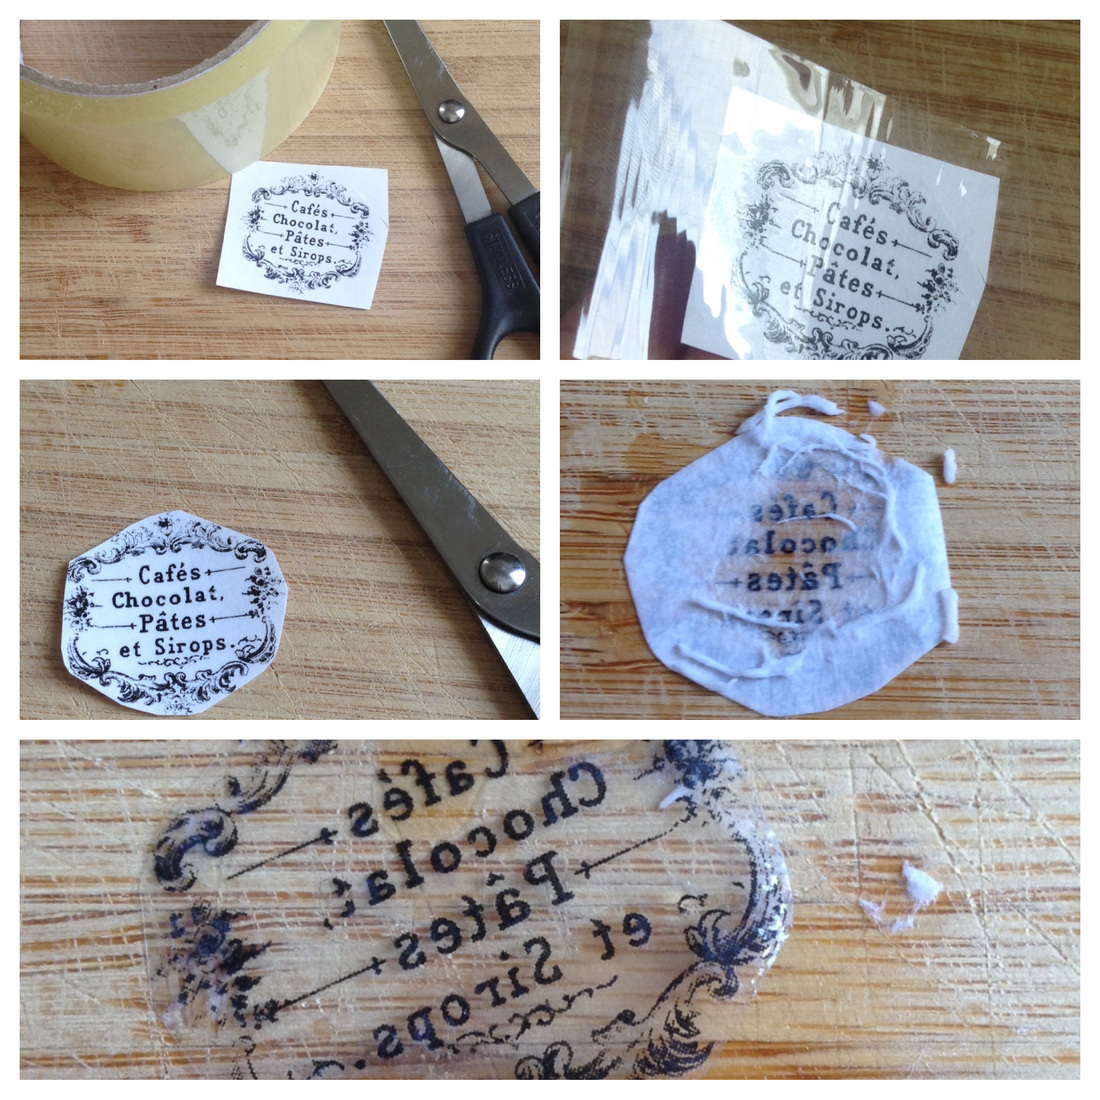
There you have it! Isn’t this amazing?? The beauty of this is that you can simply remove them once you get bored and start over.
Picture
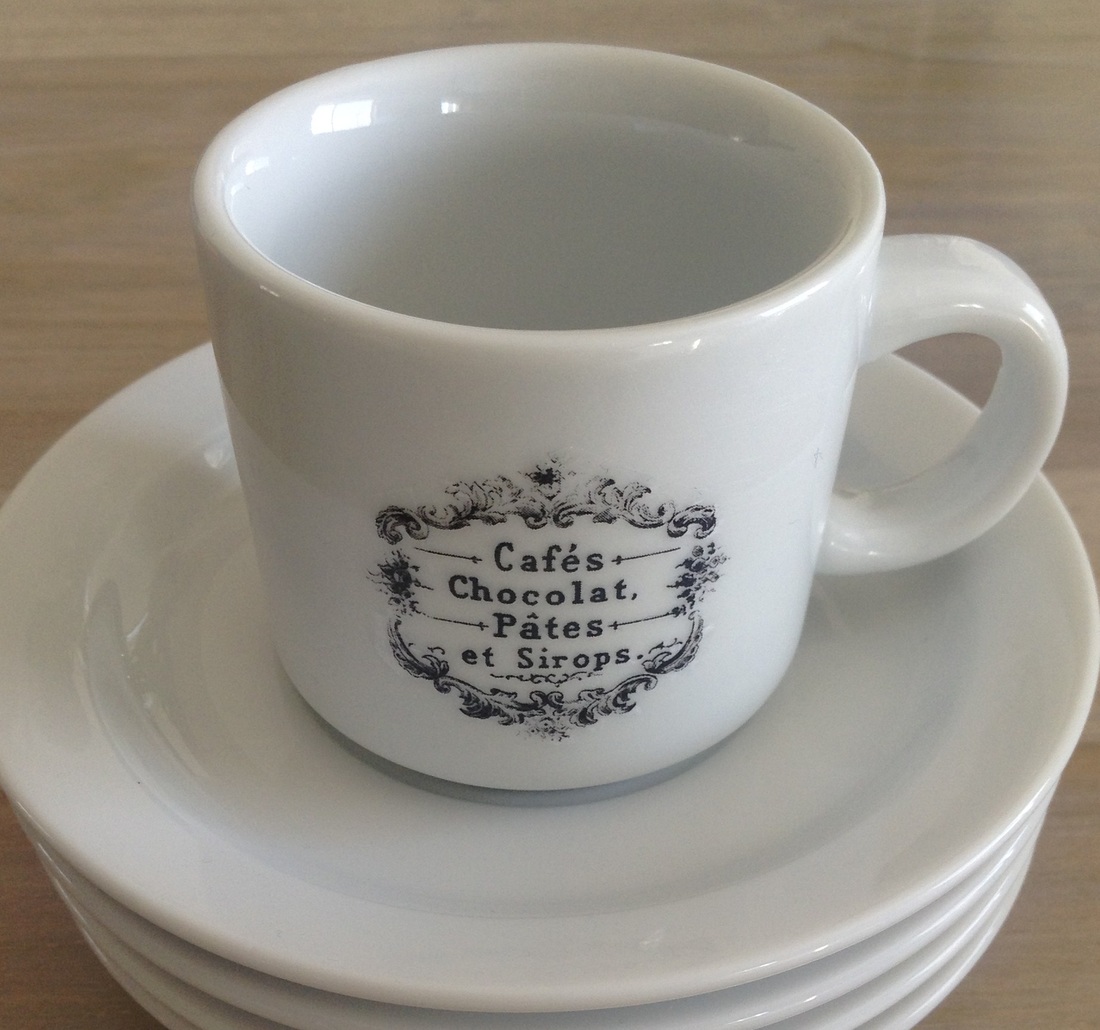
Just think of the possibilities. You can buy a few glass votives and customize them for each season or holiday! Imagine some cute valentines clip art for valentines, fall sayings for fall, or put someone’s name on and gift them! I hope you enjoyed this tutorial and if you create something, we’d love to see it!

Thank you for stopping by!  Now go and visit Vintage Reflections for some more great ideas. Mary also has a very cute Etsy shop so be sure to check that out too.  Thanks Mary!

Writing plagiarized from Vintage Reflections.  With permission.  ;)

DIY Submitted by Jessen Stephens: Hershey Candy Bar wrappers

10/8/2014

0 Comments

 
Adorable Candy Wrappers. Do It Yourself Project Submitted from one of our followers Jessen.

What she did. Using Photoshop she created a new file 5"X5.25" in 200 DPI.She then created what ever background she wanted using squares or dots in the colors of choice.

She then downloaded our Images The Haunted Villa found here:
http://www.grafxquest.com/freebies/haunted-villa-or-victorian-home-free-vintage-image
and our bride of Frankenstein.

She centered her images in the middle of the square and threw on some text.  When she was happy with her creation she printed them out on photo paper, cut and wrapped her chocolate bars securing with double sided tape.

Jessen said if you are not handy with Photoshop you can just print your images directly from GrafXQuest on brown paper bag or colored paper and wrap your bars.

Either way don't they look yummy?  Super fun to give to your trick-or-treasurers!
Picture

Jessen's Candy Bars using our Halloween Images on the Freebie Page.

Thanks so much Jessen for your DIY submission. Since you are our first brave submitter to our DIY board you win a Gift certificate worth $50 to Michaels' Craft Store. Thanks so much and I encourage you all to share your DIY.   ~Thanks Lady T

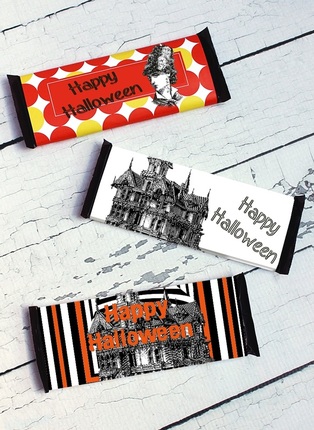
Want to do other Candy Bar wrappers? I hunted down the sizes for you plus a few more fun oddities for your Halloween projects, Enjoy!

These are the DIMENSIONS of some Wrappers  for Candy Bars & other Items
Hershey snack size candy bar: 2-1/2" wide by 3-1/2" long
Full size Hershey bar: 5" wide x 5-1/4 long
Baby Ruth: 4" wide x 4-1/2 long
Kit Kat bar: 3-1/4 wide x 4-1/4 long
M&M bag: 3-1/4 wide x 3-1/2 long
1.5 oz. Hershey's Symphony: 4-3/8 Wide x 4-1/2 tong
Charleston Chews: 3-3/4 wide x 10" long
Reg. size Almond Joy: 4-1/5 wide x 7-1/4 long
Reese Sticks and Cups: 6" wide x 6-1/4 long
Rolo's round candy: 3-1/2 wide x 5" long
Mr. Goodbar 6-1/4 wide x 6-3/4 long
Peppermint Pattie: 4" wide x 7" long
Lifesavers: 2-1/2 wide x 3" long
Stick of gum: 3"wide x 2-1/2" long
Dentyne Wrapper: 2-3/4 wide x 3-1/2 long
Tic Tac: 1-1/4 wide x 5-1/4 long
Campbell soup can: 3-1/2" Wide x 8-1/2" long
Soda Pop Label: 4-1/2 wide x 8-3/4 long
1qt. paint can: 13-1/2 Inches long by 4-1/2 inches high
1 qt Paint can lid takes a No. 5295 Avery label
Fuji film Canister: 4-1/8" around x 1-7/8 . top to bottom
Matchbox: 2" wide x 4-1/2 inch long
0 Comments

Old Chest Re-purposed

8/26/2014

 
Picture
Lovely Chest re-purposed using the transfer method by Cat-arzyna.  The images are vintage images like the ones found on the Freebie page. Need information on how to do transfers onto furniture? I am not going to beat the horse here since this video has it down perfect for us already. So follow this link for a great video freebie how to: http://www.youtube.com/watch?v=dv7VNNoL8xo
Things you should know first.
1. This video is for a wall but you would use the same concept for the furniture piece.
2. You will need to blow up your image to a larger size. if you have a projector you can trace it onto clear plastic and put the image up on your furniture piece or if you have photo shop you can piece it out on to several pieces of letter sized paper.
3. if you are not Photoshop savvy there is

a Free online site called BlockPosters.com
I am going to do a quick walk through for you of Blockposters.com
First open another tab so you can walk through with me...I will wait...ok are you back? Great! Ok moving on.

Step 1 Click on the “Browse” button and select your file and then click “Continue”.
Step 2 You will need to decide on how many sheets of paper you would like the image to be spread across on. (You can lay blank pages out on your project to see how many it will use.) Then just use the arrow keys on Blockposters.com to change the number of pages.  Next select Portrait or Landscape then you will see the measurements on screen. When you have the size you want click continue.
Step 3 Click on the red text that says “Click here to download a pdf file blah blah blah....
Step 4 Print out your pages and now you are ready to pick up where the video above starts!

For transferring you will need: 1) Light colored Pastel Stick   2) Ball Point Pen
To Paint your images you will need either: 1) A small round brush & some paint or 2)Paint Markers
When completed, you may want to seal your piece with your favorite clear sealer to protect it. Walla Fini! Happy re-purposing!

Be sure to share your DIY projects using our images. We would love to share them and also give your blog some exposure.

Old Basket to Towel Holder

8/26/2014

 
Re-purpose a vintage basket into a towel holder. Using ribbon by threading through one end of a basket you can create a tie ribbon hanger. Mount a vintage picture frame with one of our Free images inside for decoration. Hang from a plant hanger. Fill with Towels. Simple and takes less then an hour to make!

Upload your DIY projects using our free images. We would love to see your projects!
Picture

Baby Crib Turned Settee

8/26/2014

 
Picture
Project ideas for using the free downloadable images on the Freebie page.

Try turning an old baby crib into a settee. Create your own pillows by making a transfer from any of the images. Transfer to material or simply on a pillow case...stuff. Sew end closed walla! Pillows LOL. Yes it really can be that simple.  How cute is this too!

Upload your DIY projects featuring the free images you download and share with others. We have over 200+ followers daily.


    Do
     it
    Yourself
    Fan Projects

    This area features YOU. Submit projects to us using Downloads from GrafXQuest as part of your project. Though we can't feature every project we will make every attempt to feature your fantastic work! Submit your Projects through contact page. Click!

    CONTACT

    Archives

    April 2015
    October 2014
    August 2014

    Categories

    All
    Baskets
    Chest
    Cribs
    Frames
    Halloween Projects
    Pillows
    Transfer Methods

    RSS Feed

    Advertise Your Site Here!

    Click Here
    Back to top
    Back to top
CONTACT US

Free Content

BECOME A PATRON MEMBER

Advertise on our site

FAQ

PRIVACY POLICY
Picture
                                                           ©1996-2022 GrafXQuest LLC   All Rights Reserved.