Search the site...

Graf X Quest
  • HOME
    • Offerings & Pricing
    • The Design Process
    • Portfolio
  • ■ Global Market Place
  • ■ Free Content
  • ■ Vintage Free Images
  • Blog & Public Tutorials
    • Member Tutorials
    • Zenful Artistry
  • HOME
    • Offerings & Pricing
    • The Design Process
    • Portfolio
  • ■ Global Market Place
  • ■ Free Content
  • ■ Vintage Free Images
  • Blog & Public Tutorials
    • Member Tutorials
    • Zenful Artistry

the art of calligraphy part 8

3/19/2019

0 Comments


By: Lady T Powers & JetPens

Picture


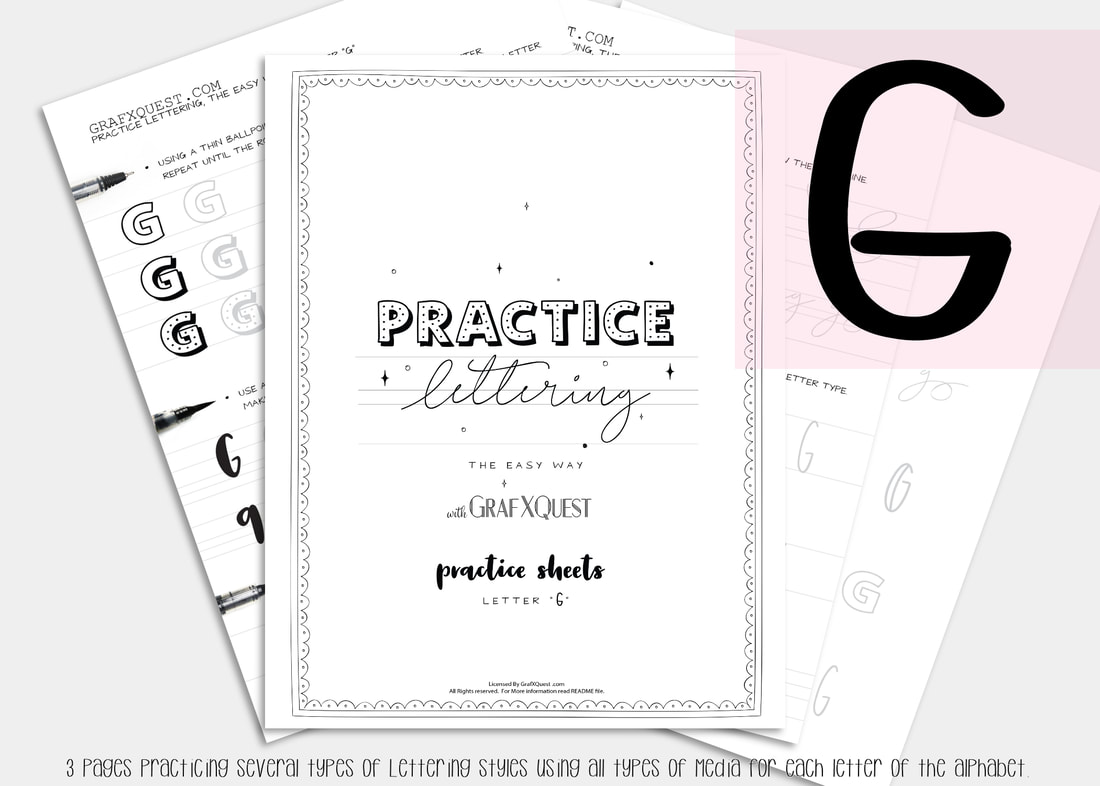
 Now For the letter G
Several posts ago we started you out with some practice sheets so you can start getting the feel of playing with lettering.  You will also be able to print those sheets out as many times as you like to have extra space to practice the above lesson.  You can get them here: Practice Sheets.   You can also see the previous posts you missed starting with the Letter A here : Lesson A Get the print outs here: Letter A Printouts , Letter B Printouts , Letter C , letter D,  letter E and letter F Printouts!

Want to share these with someone else? We ask that you do not share our files, instead share our link above to this post. Thanks. Be sure to read the first post for letter A as it will have some important hints to help you along with the rest of these lessons.

Lets Move on to to the letter F.

Following the instructions laid out in our last posts on the letters A, B, C, D, E and F be sure to print out your letter G files to follow along. The Letter G Lesson will be available free until March 26th 2019, at which point it will then become a $1 to help support the site. Hurry get it now.

All lessons in this blog are for letter formation and tips for learning Hand lettering and may apply indirectly towards the kit you are working on.  However these lessons should assist in most if not all cases in developing your lettering skills with these lessons.  We will assume you now have read the posts on the letters A,B,C,D, E and F plus have printed out your G files and practice sheets, and are ready to work! 

Today we are going to talk about best brush pens for lettering and calligraphy. PART 2 Beginners

 Dramatic Lettering & tools to try

Let me first start by saying, that by no means should you rush out to buy these supplies.  You can always use what you have on hand.  But it's always good to be exposed to different methods.  We’ve all seen beautiful lettering with extra crisp hairlines and whimsical twirls. In this case it is helpful to have tools that can make this easier.  For dramatic lettering, the brush pen tip should be soft and elastic so that you get more stroke variation. Pigmentation is also another consideration.  We will look at both today.

I do recommend using a dark black ink to convey your message boldly. Additionally, seek out brush pens with archival ink—you want your beautiful lettering to last! Without archival ink over time your lettering may fade.
Picture
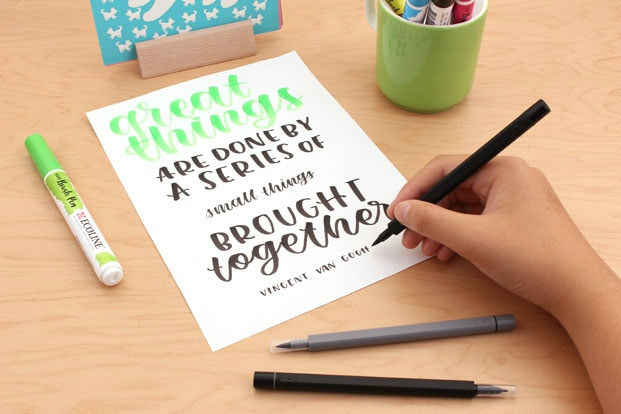
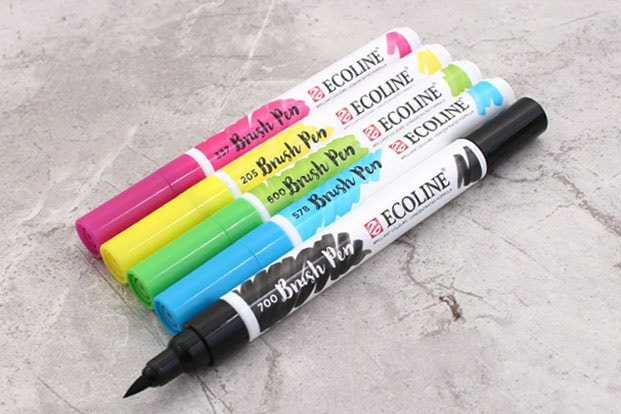
 The Royal Talens Ecoline Watercolor Brush Pens (Below) and Uni Brush Pen Set are great for dramatic lettering. 

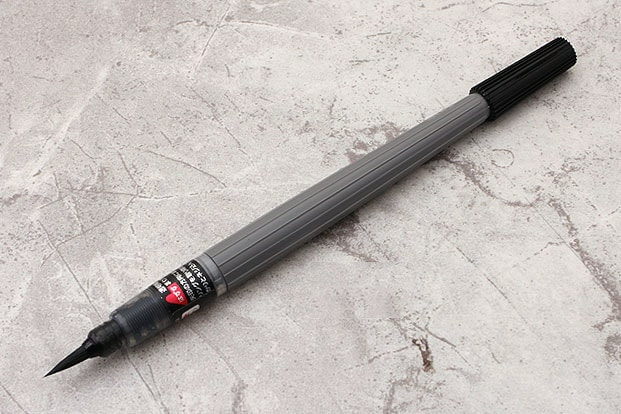
The Pentel Pigment Ink Brush Pen creates both crisp lines and strong strokes.The ink is dark and wet—it’s one of the darkest we’ve seen. The ink dries in about 10 seconds. After it dries, it is lightfast and water resistant. When your brush runs low on ink, give the barrel a simple squeeze. You can refill the pen with refillable cartridges after the ink runs out. The barrel looks rather long, but its length and slenderness make it feel quite balanced.
The Pentel Pigment Brush Pen is typically used for traditional Asian calligraphy but is suitable for modern Western script too. For Asian calligraphy, you can create a dry, streaky brush effect by reducing the amount of ink squeezed out and flattening the tip’s individual hair fibers on the page.

Picture
Pentel Pigment Brush Pen.

Let's see this pen in action...

 WaterColor Calligraphy Pens

Available in 30 colors, the Royal Talens Ecoline Watercolor Brush Pen contains a liquid watercolor paint that is transparent and easy to mix. When you write with this pen, copy paper puckers slightly, just as it would with traditional watercolors. The soft, flexible nib can be used for creating fine details or filling in large areas. The colors and semi-transparent look are great for creating curly, whimsical fonts in addition to artistic illustrations. 

However due to the puckering on regular paper I suggest trying water color HOT press paper for a smooth effect or Cold Press for that bumpy effect.  Here is what I use:  (These are NOT affiliate links) Fabriano Hot Press Paper, and Strathmoore 300 Cold Press paper.  I specially use these papers if I wish to work on a quote and maybe a little illustration too. 
Picture

Let' see these pens work...

Create shadows and 3D effects

Picture
Uni Brush Set
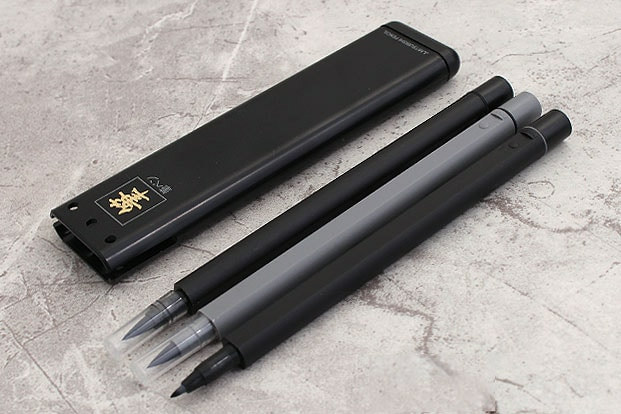
Try experimenting with a lighter grey ink beside your text to make it pop off the page.  One set of tools I like for this is the Uni Brush Pen Set which awesomely includes three felt-tip brush pens stored inside a convenient black carrying case. There are 2 black ink brush pens with a broad and fine tip and one gray pen with a broad tip. The black ink is very bold and pigmented, while the gray ink is soft and subdued.

The ink dries fairly quickly at around 5 seconds. The tapered shape of the brush pen nib allows for stroke variation, which suits both Western and Asian calligraphy scripts. The pens and the carrying case are small and lightweight, so they are convenient to use on the go. The Uni Brush Pen Set includes three felt-tip brush pens stored inside a convenient black carrying case. There are 2 black ink brush pens with a broad and fine tip and one gray pen with a broad tip. The black ink is very bold and pigmented, while the gray ink is soft and subdued. The ink dries fairly quickly at around 5 seconds. The tapered shape of the brush pen nib allows for stroke variation, which suits both Western and Asian calligraphy scripts. The pens and the carrying case are small and lightweight, so they are convenient to use on the go.

next time...

Picture
 Next time we will continue this post with additional tools for beginners.  If you frequent social media or have been to a wedding, chances are you’ve seen how beautiful calligraphy can be. If you’ve ever wanted to learn calligraphy yourself, this article is for you. We will go over some of the basic calligraphy tools you’ll need to get started and show you how to use them.   We will also be presenting you with the letter H practice kit for free! 

Will you Share your work with us? We would love to feature you.  Contact us with what you have done so far and submit your images to us as well as any tips or hints you have found so far in your journey with us. We would love to share to help everyone!

We hope we have given you some additional insight into developing your hand-lettering.  Have fun working with the Letter G practice sheets. I highly suggest printing them on to  HP Printer Paper, Premium 32.  Now that you have some insights on pens and why, (hints on practice sheets too) begin following the directions on your G Sheets. The entire alphabet will soon be ready to purchase as a complete set.  Until then Hhhh...eck it was good seeing you!

Need Additional Space to practice?  Don't forget your calligraphy practice sheets,  now featuring an extra bonus, that track the pen type you use and has six brackets set up for practicing whole lines or single letters.  See you next time!
Thanks! ~ Lady T
0 Comments

Your comment will be posted after it is approved.


Leave a Reply.

    Help Us? Take Survey

    About this page.

    Life in general is an art and I will show you how to find the beauty in everything you see and do.  Subscribe and receive a free weekly download and updates.

    Subscribe to our mailing list

    * indicates required

    Archives

    May 2019
    March 2019
    October 2018
    April 2018
    March 2018
    February 2018
    September 2017
    August 2017
    July 2017
    June 2017
    May 2017
    April 2017
    March 2017
    February 2017
    January 2017
    December 2016
    June 2016
    May 2016
    January 2016
    August 2015
    June 2015
    May 2015
    April 2015
    February 2015
    January 2015
    December 2014
    October 2014
    September 2014
    August 2014
    July 2014

    Categories

    All
    Antiques & Vintage
    Apothecary
    Art
    Awards
    Banners
    Coffee & Design
    Colonel Sprockets
    Contests
    Digital Art
    E Books
    E-books
    Epiphanies
    Free Stuff
    Gallery
    Graphic Design
    Graphics And Food
    Greg Towning
    Hand Lettering/Calligraphy
    Health & Art
    Holidays
    Marketing
    Movies
    NORGA
    People Of Interest
    Photography
    Pinterest
    Recipes
    Site Related
    Sleep
    Spices
    Tutorials
    UK To The US
    Vintage Editing
    Washi
    Wedding Photography

    RSS Feed

    Are you able to donate a $1 through PayPal to help assist this artist in keeping this extensive site alive. It is all out of pocket and costs over $50 a month to finance.  If you enjoy this site it would really help. Thanks in advance!
    Back to top
CONTACT US

Free Content

BECOME A PATRON MEMBER

Advertise on our site

FAQ

PRIVACY POLICY
Picture
                                                           ©1996-2021 GrafXQuest.com  All Rights Reserved.